The first piece of jewellery I ever made was a silver band. It is a great project to learn basic silversmithing skills such as annealing, soldering and forming with a mandrel. The ring below was made from sterling silver sheet.
** Important! As with all silversmithing, please be aware of the hazards of this project such as hot metal, chemicals and loose metal. I recommend the employment of safety equipment at all times, such as a pair of goggles, a face mask and gloves. I also recommend the reading of the relevant MSDS for each chemical in use before undertaking this project. And remember, hot metal looks like cool metal! **
Equipment you will need
- propane/butane torch
- sheet silver
- saw
- silver solder
- flux
- nylon or rawhide mallet
- steel ring mandrel
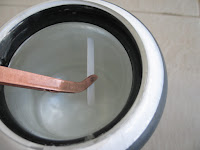
- pickle and pickle pot
- copper tongs
- rinse bath
- file
- sandpaper
- polishing wheel
- polishing compound
Method


1. Saw the silver sheet to the desired size. Remember that if you are making a thick band, size it 1/2 to 1 size larger than usual.
2. Anneal your sheet by heating the silver evenly until it glows a light salmon pink. Be careful not to melt your silver sheet - continually move the flame so that the heat is not concentrated in one spot of the silver for a long period of time.


3. Pick up the ring with tongs and drop it in your pickle pot to remove firescale.
4. Pull your item out of your pickle pot with some copper tongs and rinse in a rinse bath.
5. File the ends of the sheet so they will align with each other neatly.


6. Begin forming the ring by bending the sheet around the steel mandrel with a nylon or rawhide mallet, lining up the ring ends so they butt up closely.


7. Apply flux to the joint and place some silver solder on the joint.


8. Heat the ring evenly with the torch flame until the solder melts and wicks into the joint.
9. Pick up the ring with tongs and drop it into the pickle pot to remove the firescale and rinse in the rinsing bath.


10. Dry the ring and slide it onto the steel mandrel. Shape and size the ring evenly using a nylon or rawhide mallet.
11. Inspect the joint and file it neatly until the joint cannot be seen.


12. Take the ring off mandrel and finish the ring with some sandpaper.

13. To finish, polish the ring on a buffing wheel using polishing compound of your choice, or leave with a brushed finish.
![n e p h i l i m [ b l o g ]](https://blogger.googleusercontent.com/img/b/R29vZ2xl/AVvXsEjeI599TT4nCPEH5zwI5OvTJ4LMwNG5q2C8p_Iq2y8RHhds48JtZrTFoq7rOW3kw4UQ_tO2RLgsEyNWbJBD7CbVcL6frQakxua9r8nT7iiFJRUQ-nXHz_CtUbOcBncRJQBSdDqVUlqh2_0/s718/nephilim_banner_blog_stretch_dev_cufflinks.jpg)


